Out of the box Shopify provides a good implementation of Google Analytics including Enhanced Ecommerce. Our solution builds upon that implementation to provide you with additional data analysis capabilities. We also deploy Google Tag Manager with a rich data layer for your other marketing channels. Best of all, the installation is straightforward and you can get going in no time.
In the spirit of Open Source, this solution is available on the MIT license and full source code is available on our GitHub repository: https://github.com/3whitehats/shopify-gtm-ga/. If you're feeling adventurous then please do modify the code to suit your unique requirements, we've set some sensible defaults but it may be that your requirements differ slightly. (And if you do modify the code, we'd love to hear from you!).
How does it work?
We extend the existing Shopify integration with Google Analytics, this allows their native integration to be maintained and allows you to keep the checkout funnel tracking (something that is otherwise limited to Shopify Plus subscribers).
A script is added to your theme files and included within the <head> of every page of your website, this script extracts important data insights from Shopify core objects and makes this data available within a variable.
From there this data is then used on every pageview of the website, sent to Google Analytics and made available within Google Tag Manager to share data with your other marketing channels.
What is enabled after setup?
Once configured you'll have some additional data insights available within Google Analytics and data exposed to Google Tag Manager for your other marketing channels.
This will allow you to run reports and build audiences based on this data, for example:
- If users land on a product page that is out of stock, does that impact conversion rates?
- If a user lands on a page with multiple variants (such as shoe size or colour) and some of those variants are out of stock - does conversion rate reduce?
- Add customers with the tag "VIP" to an audience for remarketing in Google Ads.
- What are the most popular page types?
- What product types are viewed most frequently across the website?
- Add customers that have viewed a product with the tag "Best Seller" to an audience for remarketing in Google Ads.
- etc
None of the above is easily accessible with Shopify's default integration - it's seamless with this solution and made accessible through custom dimensions.
Google Analytics
Our solution enables 20 custom dimensions, 2 Content Groupings and provides the User-ID values needed if you wish to enable User-ID features in Google Analytics. Below we break down what these values are, and what they do.
Content Groupings
Page Type
A content group for the page type, enabling grouping of pageview hits by the page type.
Collection Group
The collection group currently being viewed, either a collection page or when viewing a user is viewing a product from a collection, the associated collection.
Custom Dimensions
| ID | Name | Scope | Use |
| 1 | User ID | Session | If a user is logged in, their corresponding Shopify User-ID. |
| 2 | Customer Lifetime Value | User | If a user is logged in, their lifetime order value. |
| 3 | Customer Total Orders | User | The total number of orders a customer has created |
| 4 | Customer Tags | User | Any tags you've defined for the current user. For example "VIP" or "Wholesale" - this is great for audience building. (This is a comma separated list) |
| 5 | Page Type/Template | Hit | The current page template a hit was triggered on, really helpful when analysing your page template performance. |
| 6 | Cart Total | Hit | The total value of a users cart when this hit was made. |
| 7 | Cart Product Count | Hit | The number of products in a users cart when this hit was made. |
| 8 | Collection Name | Hit | The collection a user is viewing and/or the collection a product is in. (Only available for products when the collection is within the page URI). |
| 9 | Collection Product Count | Hit | The number of products available within the page when a user is viewing a collection. |
| 10 | Product Name | Hit | The product name currently being viewed by the user. |
| 11 | Product SKU | Hit | If defined, the Product SKU currently being viewed by the user. |
| 12 | Product Type | Hit | The product type defined within the Shopify CMS for this product view. |
| 13 | Product Brand | Hit | The product brand defined within the Shopify CMS for this product view. |
| 14 | Product Price | Hit | The price of the product at the time of this product view. |
| 15 | Product in Stock? | Hit | Boolean, true/false - was the product in stock when it was viewed? |
| 16 | Product Stock Qty | Hit | The quantity available for a product when it was viewed. |
| 17 | Product Tags | Hit | The tags defined for this product within the Shopify CMS. (Comma separated list) |
| 18 | Product has no variants? | Hit | True if the product doesn't have any variants, false otherwise. |
| 19 | Number of Variants | Hit | How many variants does this product have? |
| 20 | Number of Variants in Stock | Hit | How many variants were in stock when this product view occurred? |
Installation
Requirements
Before we get started on the installation you'll first need:
- A Shopify Store (duh!) with administrative access.
- A Google Tag Manager container and it's ID (see "Create a new account and container" on this page https://support.google.com/tagmanager/answer/6103696?hl=en)
- Google Analytics should be setup within Shopify already.
Install and configure our code on your website
We'll start with the deployment of the code on Shopify, this process is reasonably straightforward and the changes simple, but if you're not comfortable with any of the setting/theme changes below I'd suggest liaising with your development team so you don't break anything (or step on any toes!).
Note: If you have a process for deploying theme changes then this should be followed to ensure you don't have any conflicts.
First, install the liquid snippet that powers the solution.
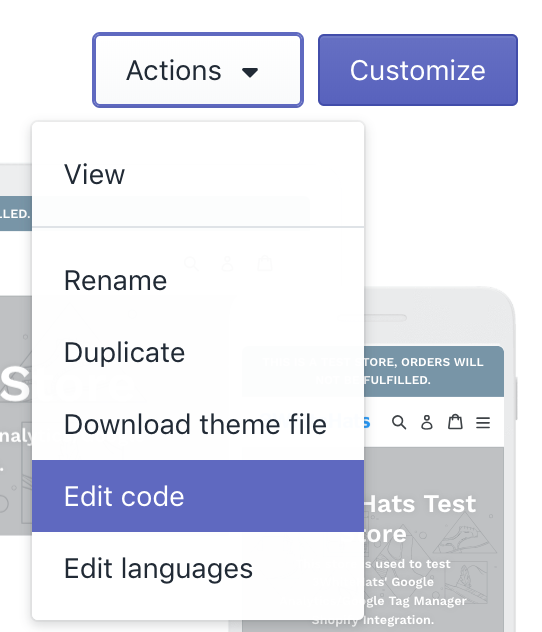
1. Navigate to your theme code in Shopify (Online Store > Themes > Current Theme > Actions > Edit code):
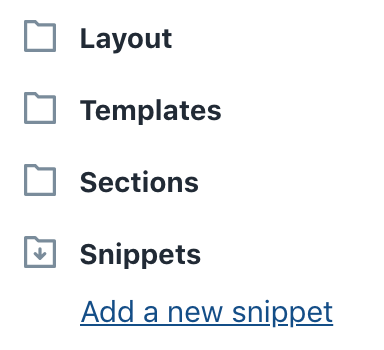
2. On the left hand side, scroll down to "Snippets" and hit "Add a new snippet":
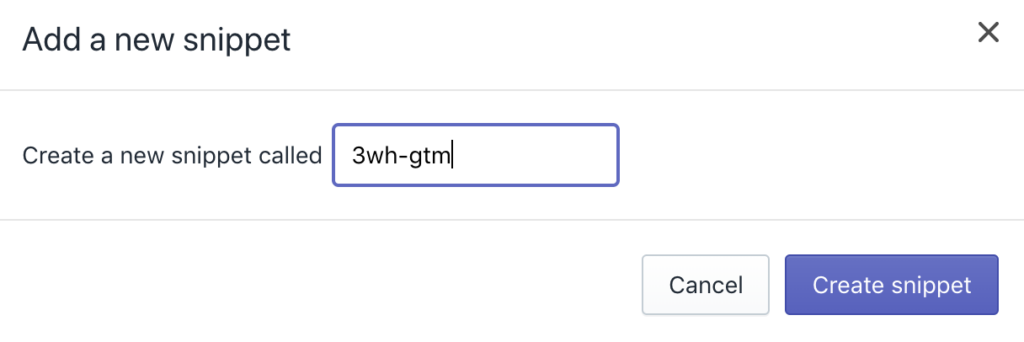
3. Give your snippet a sensible name (ours is called 3wh-gtm)
4. Copy the code from our Github repository from the 3wh-gtm.min.liquid file and paste it into the new file, you should end up with something that looks like this:
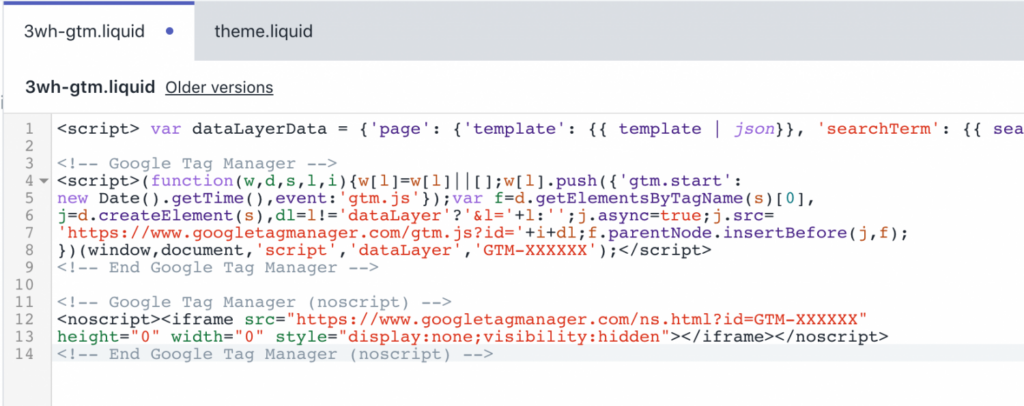
5. At the bottom of this file, there is a snippet of code that looks like the below. Replace the code GTM-XXXXXX with your Google Tag Manager Container ID.

6. Hit Save.
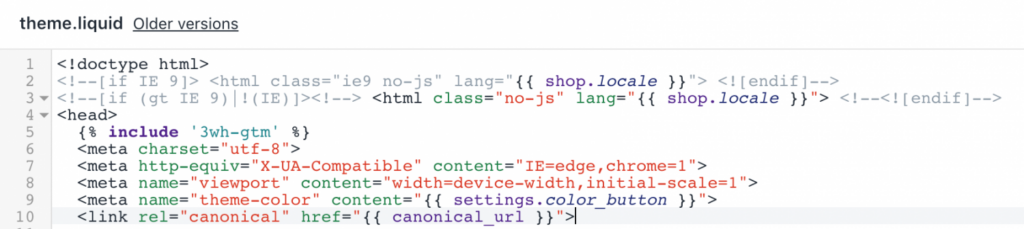
7. On the left hand side again, navigate to your theme.liquid file:
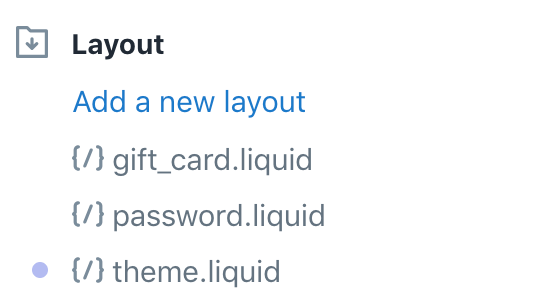
8. At the top of this file, immediately following the <head> add an include for your new snippet (note, this should match the name of your snippet from the previous steps), :
{% include '3wh-gtm' %}
Note: Make sure you have plain apostrophes when you copy and paste the above code, we have had some reports where the copy and paste has led to smart-quotes being added which will not work and cause a theme error.
For example:
9. Finally, hit Save on this file as well.
Note: This does not install the non-JS snippet for Google Tag Manager, if you would like to add this it will need to be added to the <body> of the page separately.
Next, Configure the Google Analytics scripts.
1. Navigate to your Online Store Preferences (Online Store > Preferences)
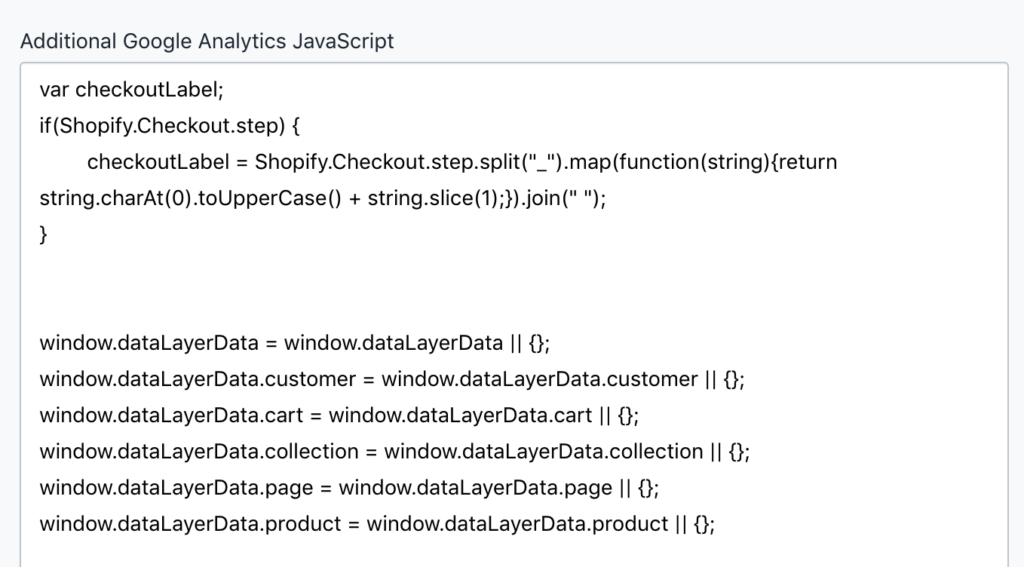
2. Scroll down to the Google Analytics section, and you should see a box labelled Additional Google Analytics JavaScript.
3. Copy and paste the file in our Github called additional-google-analytics-settings.js into this text field.
4. Make sure the "Use Enhanced Ecommerce" checkbox is ticked.
5. Save your changes.
Next, configure your checkout success page.
Shopify's checkout success page is completely separate to the rest of your theme files and we need to track things separately there.
1. Navigate to the Checkout Settings page (Bottom right Settings > Checkout).
2. Scroll down to Order processing and find the input box Additional scripts.
3. Take the code from our file named additional-scripts.min.liquid and paste this into the input box.
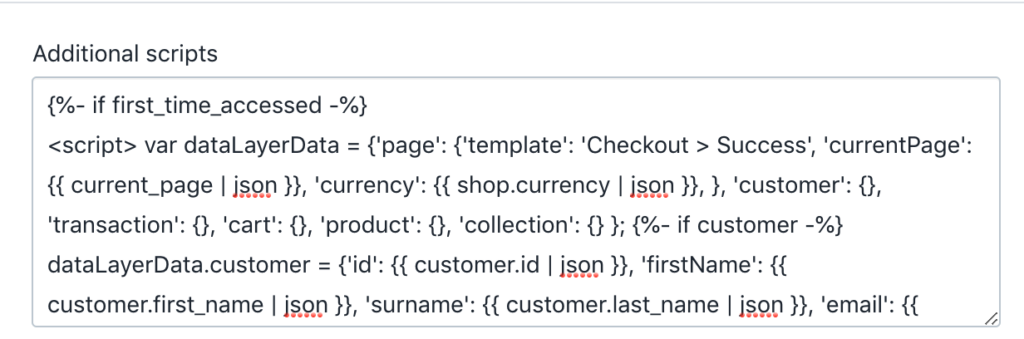
4. Modify the Google Tag Manager code at the bottom of this file, again updating the ID GTM-XXXXXX with your respective Container ID (as you did during the theme snippet file addition).
5. Hit save.
Configure Google Analytics to use your new data
At this point in the process your data is already flowing to Google Analytics (and Google Tag Manager), however the platform needs to be configured in order to make use of this data and enable your data insights.
Note: This guide does not cover the configuration of User-ID features, if you would like to enable User-ID features follow Google's guide (we've covered the installation within the tracking code, but you will need to complete the rest of the setup).
Install Custom Dimensions
Custom Dimensions are what will be used to store all of the additional Customer, Product and Website properties we're sending to Google Analytics.
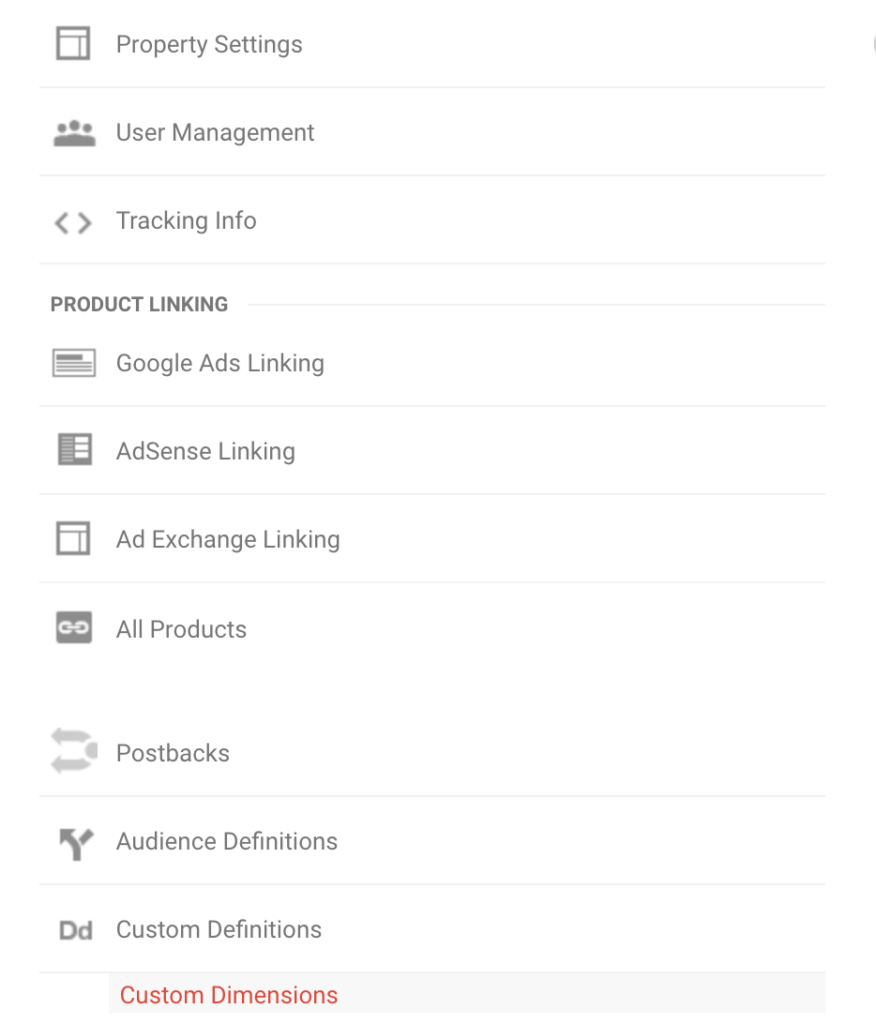
1. Navigate to Admin and under your Shopify analytics property, select Custom Definitions > Custom Dimensions
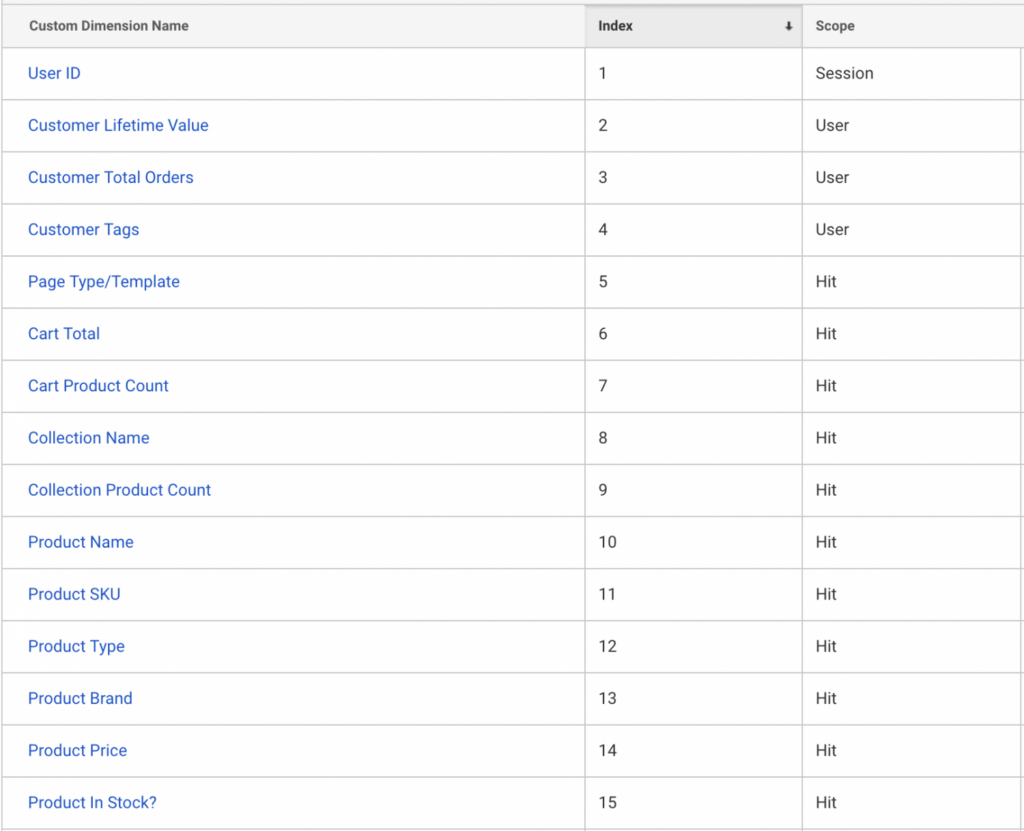
2. Hit Add Custom Dimension and add the following Custom Dimensions in the order below. It is important these are added in order and make sure you choose the Scope that matches the below:
Setup Content Groupings
1. Navigate to Content Grouping within your Analytics View of choice:
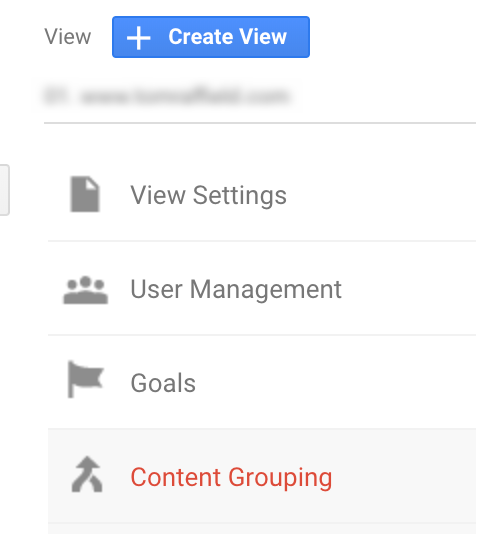
2. Click + New Content Grouping
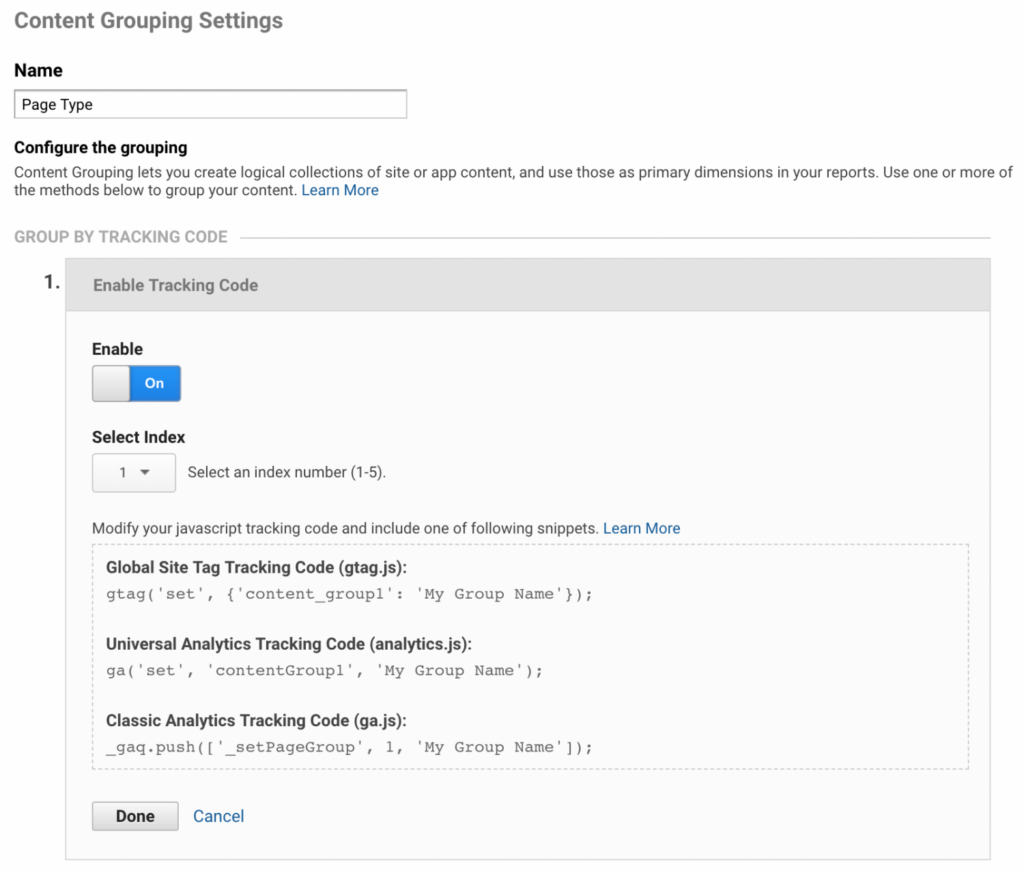
3. Configure two new Content Groupings that match the setup shown in the screenshots below:
Page Type
Collection Group

Import our Google Tag Manager container for your other marketing tags
This extension fully populates the Google Tag Manager data layer with comprehensive information about the (when relevant):
- Page
- Customer
- Cart
- Transaction
- Collection
- Product
To help, we've built a container export that contains all of the data exposed to Google Tag Manager as variables (46 in total) to help speed up your deployment. Use Google's guide if you're not aware of the process used for importing a container.
The container export can be found within our GitHub repository: https://github.com/3whitehats/shopify-gtm-ga/blob/master/gtm-import.json
Start using your new data!
That's it, you're all setup, if all is well you should start to see your enhanced data begin to populate within Google Analytics and be able to go about your data interrogation.
We've shared a couple basic example usages below, but it really is now up to you - what do you need to know to improve your website experience?
This post was created in 2019 and some of the content may no longer be relevant.
If you’re interested in learning more about digital marketing, analytics and data, take a look at our Digital Marketing Services.
Stay up to date
Receive all the latest news, events, and insights on B2B tech, marketing, and communications with Clarity’s free monthly newsletter.
Loading...
Share this
MORE
INSIGHT
Fearless tactics to achieve your strategic success
As a consultancy, our full-funnel marketing and communications solutions are designed to fearlessly deliver business results across multiple industries and service areas.